Terminal Extract and Doors | Escape from Tarkov Map Guide
Keep the 1 mapped extraction selected, confirm every access point in the raid, and add only the doors and containers that fit the return path.
Layers this guide uses


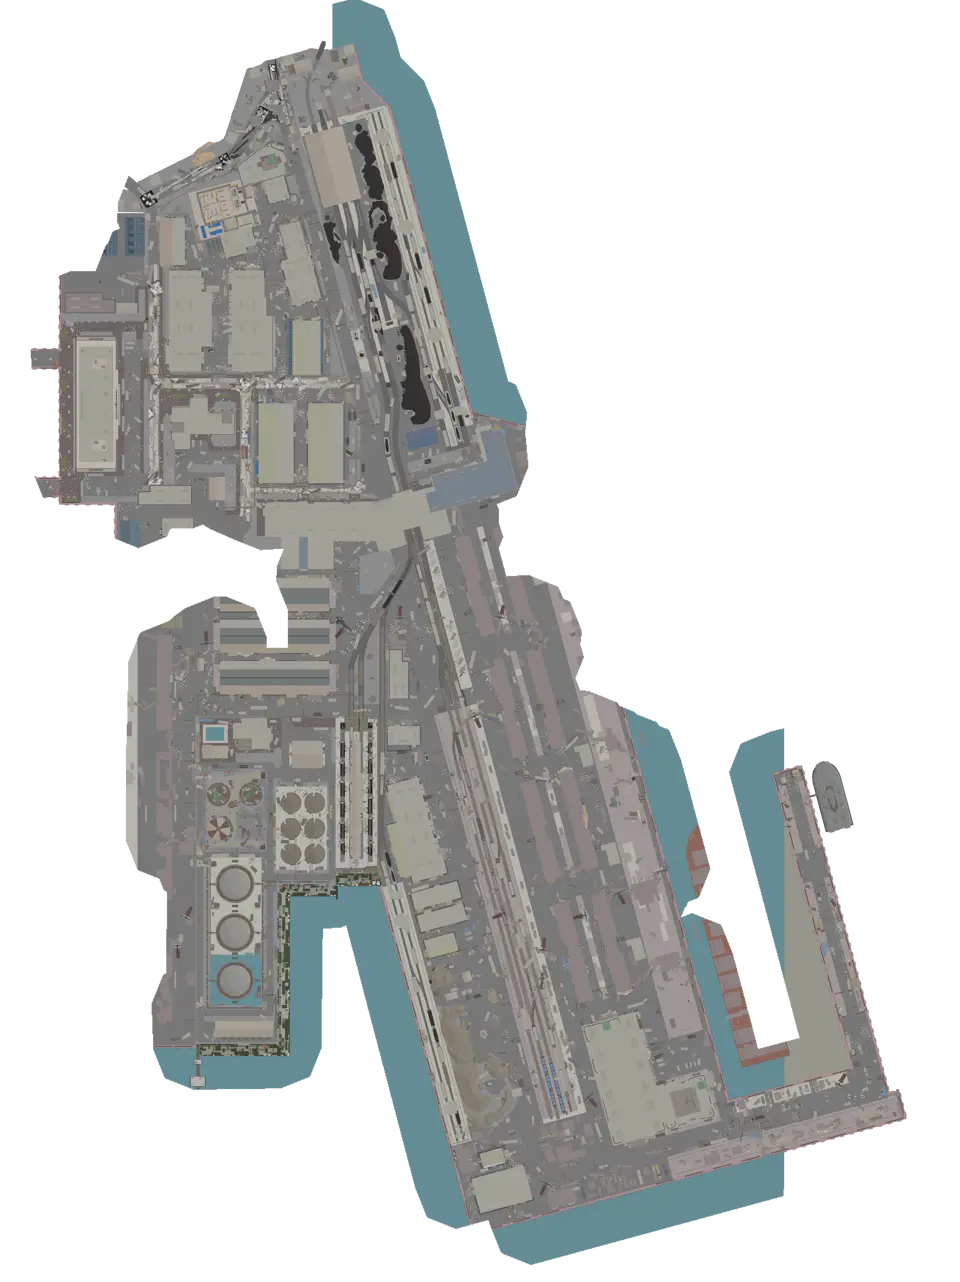
The Terminal interactive map uses the Main level view and names Final Exit Zone as its mapped exit. Select that marker first. Then identify the part of Terminal you can actually see, such as Bay station, Cargo ship, Container yard, or Port gate, and test every door and marked access point between that named area and the exit.
Terminal contains 255 markers across 1 view. That removes floor switching, but it does not make every nearby icon directly reachable. Walls, locked doors, and the usable side of an access point still determine the path.
Confirm the extraction in the current raid
Terminal currently has 1 mapped way out: Final Exit Zone. Reveal it through Extraction points, open its details, and verify that exact name and condition against the current in-game list before crossing the port.
The map records the fixed point and description. It cannot infer whether the character has been assigned that exit, whether a live prerequisite has changed, or whether the approach is currently safe. Confirm the raid state in the game rather than treating the presence of a marker as availability.
Do not promote a map edge, an open doorway, or a ladder into an alternative extraction. If the assigned list and the map marker do not agree with the expected plan, stop and recheck the list instead of inventing another way out.
Build the route backward from the exit
Select Final Exit Zone, then choose the nearest named area you have positively identified. Bay station, Cargo ship, Container yard, Hangar, Port, Pump station, and Warehouse are visible map labels, so the route can be described with actual places instead of an unnamed “recognisable landmark.” From the chosen label, trace the path back one turn at a time.
- Match Final Exit Zone with the raid list and read its condition.
- Name the current area from the labels on Main level.
- Follow each door and corner backward from the exit toward that area.
- Add Stairs: Bay station only if the route uses the Bay station access.
- Walk the same chain forward again before adding loot.
This two-way check exposes a route that crosses a wall or approaches a door from the wrong side. The shortest line on the image is not automatically the shortest walk through the structure.
Treat the connection as an access point, not a floor selector
Terminal has 1 floor connection, Stairs: Bay station. Find it under Floor connections; it is an access point inside Main level, not another map view.
Compare the extraction and connection, select the access marker, and inspect the surrounding shape. Verify where the passage starts, where it ends, and which direction fits the chosen route. If the geometry in the raid differs, return to the last confirmed landmark and approach from the other side.
Keep the marker visible only when the final route uses it. Otherwise, hiding it prevents the passage from being mistaken for an exit or a required step.
Check the exact keyed door before making a detour
Terminal lists 2 doors under Keyed doors. Show them with the connection, search a complete name such as Pier door key, and select the exact result. Compare its side with Port gate, Port, and the route you already traced; do not substitute the other keyed door merely because it is close.
Treat a keyed door as an optional branch with a reason and a stopping point. Leave the extraction route only when the task names that door or the intended room sits behind it. Trace the approach from the confirmed port label to the correct face of the door, then decide where the detour rejoins the return path. If that rejoin cannot be described before you move, skip the branch for this raid. A saved visit records your own check; the live door state still has to be read in game.
Reduce possible start and boss markers after the opening
The possible starts under PMC spawns indicate where a PMC may begin, while Possible boss spawns outlines possible boss areas. Neither category tracks a live character or confirms presence in this raid.
At the start, use the closest possible areas to judge which corridor may receive early movement. Once a first route has been chosen, hide both categories. Keeping every risk marker visible can cover the doors and the 1 extraction that matters for navigation. Continue to rely on sights and sounds in the raid for live risk.
Add containers only along the return path
Terminal‘s Loot containers layer is dense, while Loose loot marks possible pools rather than guaranteed items. Open containers after the route is ready and select a short group close to the verified path.
Fixed containers can help confirm a room, but they should not pull the route through an unchecked door or away from the exit. Add stops from the extraction backward, then set a clear turning point. When time or orientation becomes uncertain, hide loot and keep the extraction, the next door, and the last reliable landmark.
The map does not display current contents, live enemies, or door state. Those facts must be checked during the raid.
Final Exit Zone approach questions
Why does the map show 1 extraction marker?
That is the current set for Terminal. Verify it against the raid list; do not reinterpret doors, access markers, or the map boundary as other exits.
Does the stair or ladder open another floor?
No. Terminal currently uses 1 view, Main level. The connection marks a passage within it.
What should remain visible on the final approach?
Keep the selected extraction, any required keyed door, and the connection only when the route uses it. Hide loot, possible starts, and boss areas.
How should a loot route end?
Set a turning point that preserves enough time to follow the already verified return path. Do not extend it because another dense cluster appears nearby.
Maps in this guide
More Escape from Tarkov guides
All Extraction Points and Exits | Escape from Tarkov Map
The raid list decides which exits matter. Match those names to the map, read each marker, and choose a fallback before moving toward the final sector.Read the guidePMC Starts, Boss Areas and AI Zones | Escape from Tarkov Map
Read spawn layers before the first route choice, then clear them. Reopen boss or AI areas only when planning a specific approach on the correct floor.Read the guideKeys, Locked Doors and Map Controls | Escape from Tarkov
Search the exact door before routing to it. Check the threshold, the return path, and any separate control point without assuming its live state.Read the guideLoot Containers and Loose Loot Routes | Escape from Tarkov
Choose a compact cluster beside the extraction route. Treat containers as known stops and loose-loot markers as possible locations rather than promised items.Read the guideHow to Unlock Escape from Tarkov Maps through Tour
Tour unlocks direct location selection in stages, while several late locations require their own story chapter or a first visit through transit.Read the guide