Big Walk: All 84 Puzzle Locations and Player Counts
The Island has 84 marked puzzles, and 16 of them name how many players they want: 2, 3 or 4.
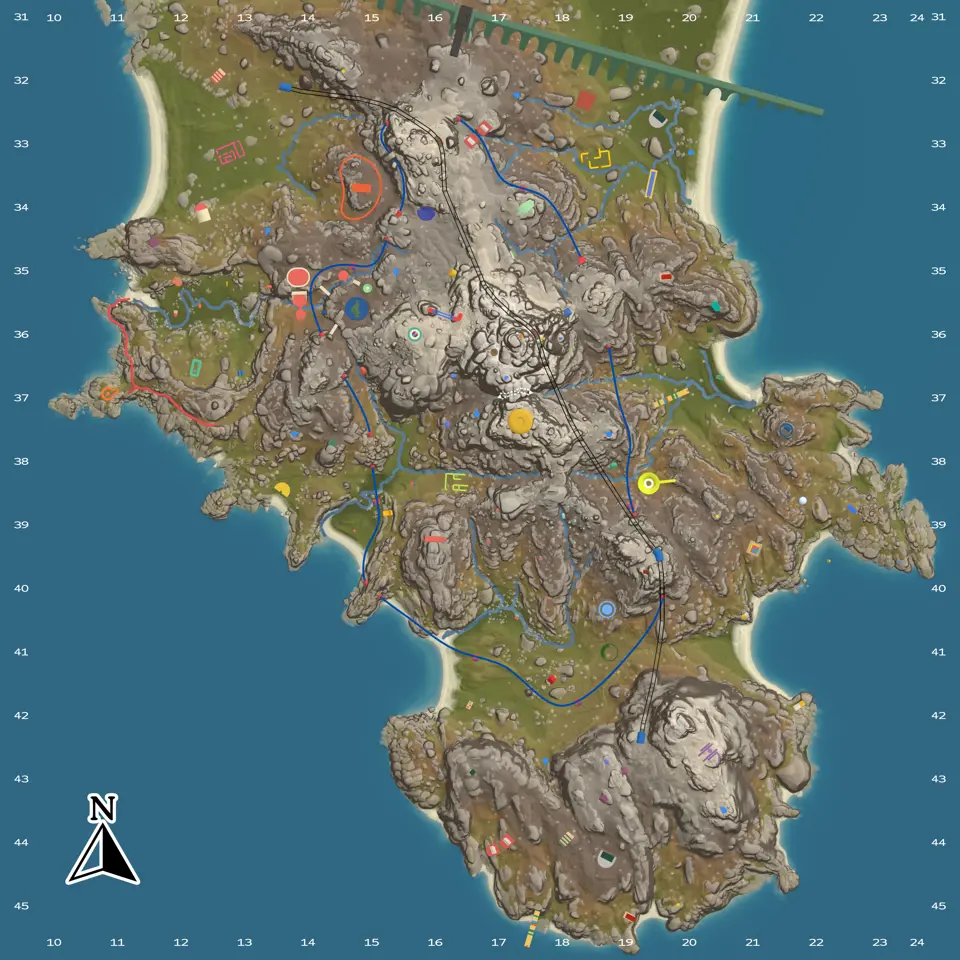
Layers this guide uses


Open the Challenges layer before the group sets out, then use the player-count clusters below for stops affected by the host’s selected world configuration.
LootMap labels these locations Challenges; this guide also calls them puzzles.
How many puzzles are in Big Walk
The Challenges layer contains 84 markers. It includes small puzzles away from the main route, puzzles inside larger challenge areas and the more obvious numbered stations.
The 16 puzzles that name a player count
Sixteen markers carry a player count of 2, 3 or 4. Some name a single number and some name two. All sixteen sit at seven places on the island, and at every one of those seven the markers between them cover 2, 3 and 4.
| Map location | Markers there |
|---|---|
| North coast cluster | one 2-and-4 marker; one 3 marker |
| North-east cluster | one 2 marker; one 3-and-4 marker |
| North-west cluster | one 3-and-4 marker; one 2 marker |
| Central cluster | one marker each for 2, 3 and 4 |
| South-east cluster | one marker each for 2, 3 and 4 |
| Western cluster | one 3-and-4 marker; one 2 marker |
| Far-south cluster | one 2-and-4 marker; one 3 marker |
Each of the three values turns up on exactly seven markers. Eleven markers name one value on their own, five say 2, four say 3 and two say 4, and the other five markers name a pair.
These seven places are affected by the host-selected 2-player, 3-player or 4-plus configuration. Players joining or leaving later do not change that setting. The other 68 markers have no player-count label.
Where the other 68 puzzles sit
Most challenge markers stand alone. 63 of the 84 have no second challenge marker nearby, while the rest form pairs or small groups. The largest group contains four markers.
Elevation matters when choosing the next stop. 28 challenges are close to sea level and 7 are on high ground. Check the contour lines under a marker before treating two nearby pins as a short walk.
Telescope puzzles and where they are
The map has 12 telescope markers, and 9 of them have a challenge marker sitting right beside them. That pairing is the reason to view challenges and telescopes together rather than one at a time.
The travel and navigation guide links all Telescope markers and explains their terrain.
Coordinate-board puzzles
Wooden boards around the island give two numbers. The Gear layer has one starting marker for the Coordinate reader. The reader shows the pair for wherever its carrier is standing, so a board and a reader together point at one spot.
The two numbers work like a grid reference. The first runs from the north coast down to the southern tip, and the second runs from the west side across to the east. LootMap turns those pairs into centred map links.
One board points to the north side, where a gourd is marked. The link centres the target on the map.
A numbered grid clue leads to a remote button rather than a Challenge pin. Use the coordinate puzzle and button guide for the full route to the rocks beside the broken train.
The Coordinate reader starts beside a bank of gourd stands in the south-east. If someone carries it away, they can read the current grid pair aloud to the group.
Skipping a puzzle your group cannot do
The accessibility options let you skip any challenge. That includes a player-count puzzle your current group cannot complete.
Choosing which puzzles to do first
Visit the seven player-count locations first if you want to see what the host’s world setting changes.
For the rest, combine nearby Telescope and Challenge markers before walking to isolated pins. Nine telescopes already have a challenge beside them, so those stops can clear two map types in one trip.
Big Walk puzzle FAQ
What does “green puzzle” mean in Big Walk?
It can mean the Green Tower route, the green soundproof-chair challenge or another green-coloured setup. There is no single puzzle with that universal name. Open the Challenge layer, start from the Green Tower area and match the structure in front of you before following a solution.
Is the peg puzzle the opening board or the 36-piece hunt?
Peg puzzle can refer to either of two activities. The opening Blue Room has a pegboard pattern that one player reads and another recreates outside. Later, a separate coloured-peg hunt asks the group to find 36 wooden pieces. The map can route you to the challenge, but it does not record the final placement pattern.
Do I need a full walkthrough to find every puzzle?
No. Use the 84-marker layer as the location checklist, then look up a solution only when the group is stuck at a specific structure. That keeps route planning separate from puzzle spoilers.
Does party size change the puzzle map?
The locations remain useful, but the host’s 2-player, 3-player or 4-plus world choice changes some challenge configurations. The crossplay, platforms and player count guide explains the lobby limit and world setting.
Maps in this guide
More Big Walk guides
Big Walk: All 46 Gourd Locations and 139 Gourd Stands
Big Walk marks 46 gourds on The Island, each one starting in a stand, plus 93 more stands with nothing on them.Read the guideBig Walk Tower Order and Keys: Red Tower First
Unlock the Red Tower first, cut its key along the marked trail, then enter the blue Map Room below it to pick up the Folding map and Compass.Read the guideBig Walk Tool and Gear Locations: All 96 in 21 Types
The Island has 96 tool markers in 21 types, and five Gear types have one starting marker each.Read the guideBig Walk: The Train, the Chairlift and How Not to Get Lost
Five layers cover getting around The Island: 7 train stations, 6 chairlift markers, 7 broadcast stations, 12 telescopes and 25 trail stations.Read the guideBig Walk Map Room: Map and Compass Location
Unlock the Red Tower first, cut its key along the marked trail, then enter the blue Map Room below it for the Folding map and Compass.Read the guide