Big Walk: All 46 Gourd Locations and 139 Gourd Stands
Big Walk marks 46 gourds on The Island, each one starting in a stand, plus 93 more stands with nothing on them.
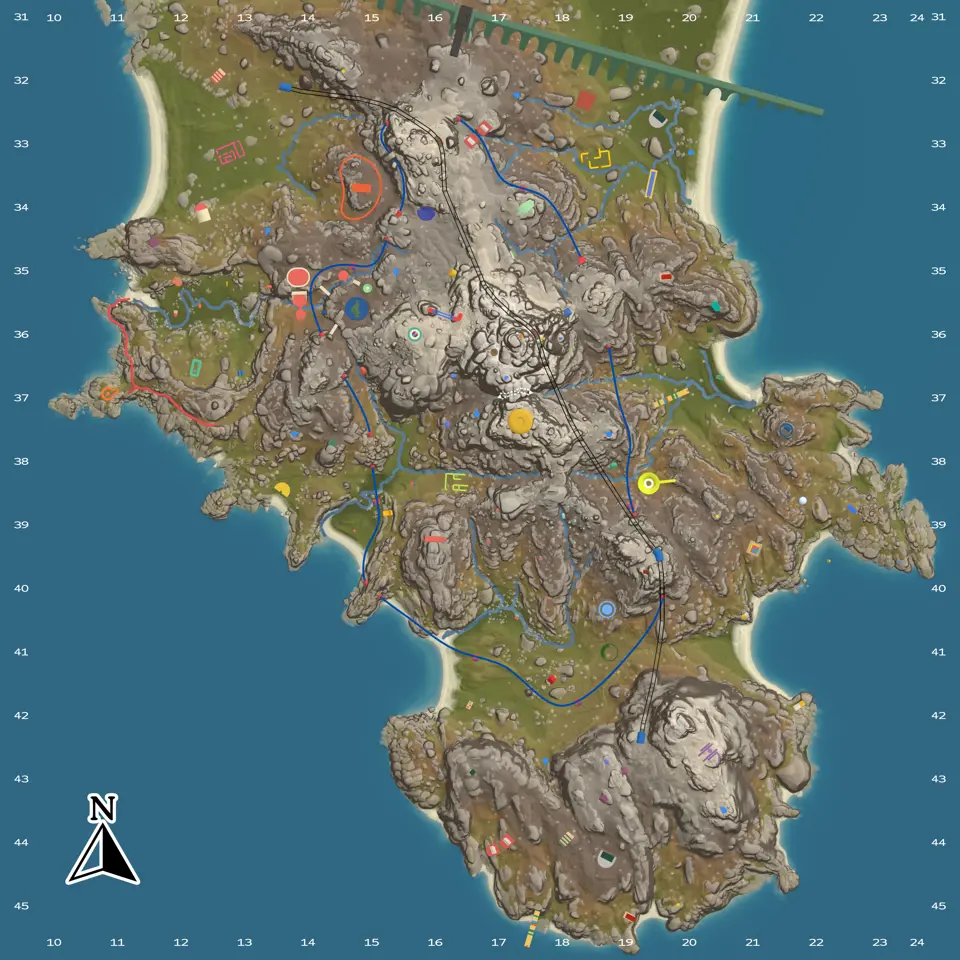
Layers this guide uses

Open the Gourds layer, then hide Gourd stands when collecting pickups and turn them back on when choosing a delivery bank.
What the red and purple pickups are called
LootMap calls both colours Gourds. Each pickup starts in a Gourd stand; the pickup and stand are separate filter types.
Where to put a purple gourd once you have one
Place it in an empty stand at the bank for the current stage. The layer separates Gourd pickups from stands but not by colour. Five stage banks hold the shoreline group of four and four high-ground groups of five. Two other large banks contain 7 and 16 stands but are not stage requirements.
If your group is one gourd short of a stage, walking it to the nearest single stand does nothing for that stage. Walk it to a bank.
Why the map counts 185
The main route asks for 30 gourds: 4 to lower the drawbridge, 5 for each of the four coloured towers, then 6 for the Black Obelisk.
The layer counts stands as well as pickups. Only the gourds leaves 46 markers on the map. Only the stands leaves 139.
The two sets overlap. Each of the 46 gourd markers sits at exactly the same point as a stand marker, so a gourd on this map is always a gourd in a stand. Take those away and 93 stands are marked with nothing in them.
The seven banks of gourd stands
Stands are not spread evenly. Seven places on the island hold a group of four or more, and those groups take up 47 of the 139. Banks are primarily delivery points: only one of those 47 stands starts with a gourd.
| Stands in the group | Map location | Key markers beside it |
|---|---|---|
| 16 | Open bank | 1 |
| 7 | Open bank | 2 |
| 5 | Open north bank | 1 |
| 5 | Open west bank | 1 |
| 5 | Open east bank | 1 |
| 5 | Open south-east bank | 1 |
| 4 | Open shoreline bank | 1 |
All 8 movable-key starting markers are beside these seven banks, and one bank shows two. Show stands and keys together to check the pairing.
The shoreline group of four matches the drawbridge requirement. Four high-ground groups of five match the four coloured towers. The groups of 16 and 7 are not stage requirements.
Where the 46 gourds start
Outside those seven banks there are 92 stands. 45 carry a gourd marker and 47 do not. The remaining gourd is inside one of the large banks.
The 46 pickups cover the island rather than forming one farmable cluster. Show only Gourds before choosing a route, since the full 185-marker view is dominated by empty stands.
Height varies far more than the flat picture suggests. Only two of the 46 sit near the top of the island’s high ground, and fifteen are close to sea level, but a marker that looks like a short walk can still be a long climb. Read the terrain under it before you send a teammate off to fetch it.
Planning a collecting run
The Island has 6 Backpacks and 5 Hip packs, and the Backpack and Hip pack locations guide links every pickup. Without extra carrying space, use short loops that end near a stand instead of long sweeps across the island.
Before a long walk, turn the stands back on for a moment. When choosing between two pickups, prefer one near a useful bank over one that requires a separate return route.
Maps in this guide
More Big Walk guides
Big Walk Tower Order and Keys: Red Tower First
Unlock the Red Tower first, cut its key along the marked trail, then enter the blue Map Room below it to pick up the Folding map and Compass.Read the guideBig Walk: All 84 Puzzle Locations and Player Counts
The Island has 84 marked puzzles, and 16 of them name how many players they want: 2, 3 or 4.Read the guideBig Walk Tool and Gear Locations: All 96 in 21 Types
The Island has 96 tool markers in 21 types, and five Gear types have one starting marker each.Read the guideBig Walk: The Train, the Chairlift and How Not to Get Lost
Five layers cover getting around The Island: 7 train stations, 6 chairlift markers, 7 broadcast stations, 12 telescopes and 25 trail stations.Read the guideBig Walk Map Room: Map and Compass Location
Unlock the Red Tower first, cut its key along the marked trail, then enter the blue Map Room below it for the Folding map and Compass.Read the guide