Big Walk Tower Order and Keys: Red Tower First
Unlock the Red Tower first, cut its key along the marked trail, then enter the blue Map Room below it to pick up the Folding map and Compass.
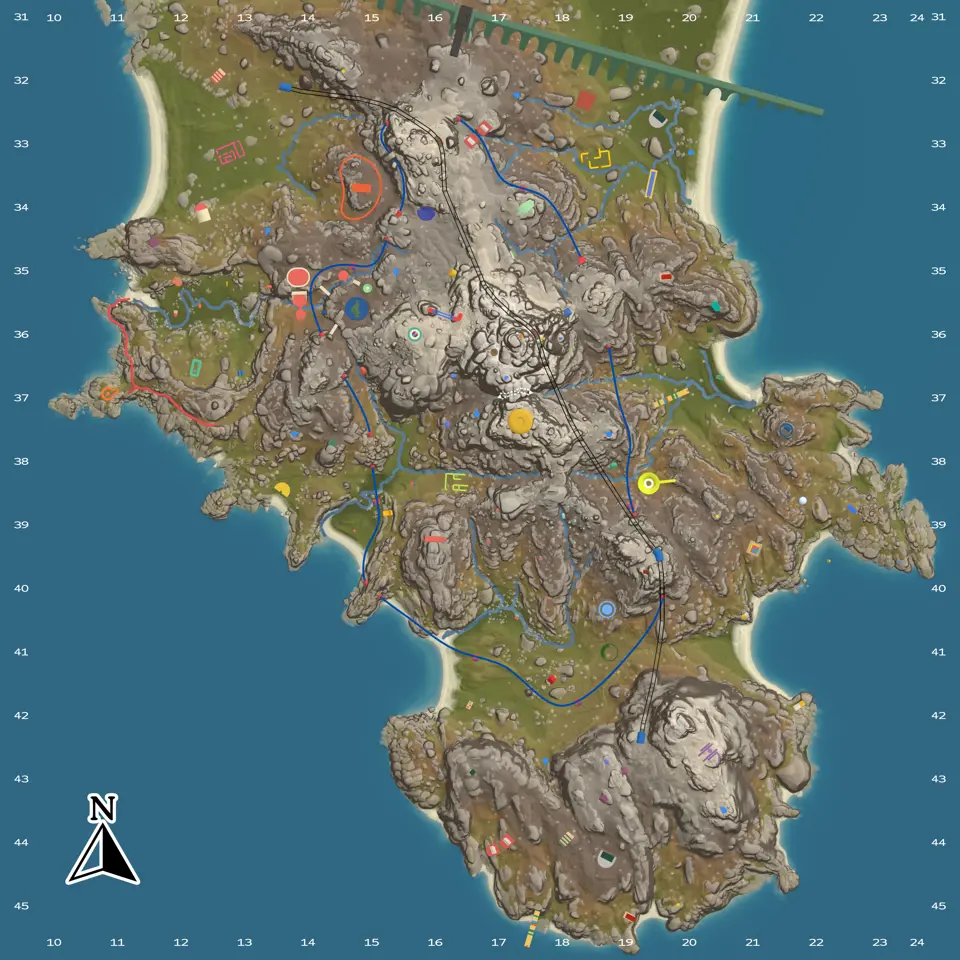
Layers this guide uses


Open the Keys layer before climbing a tower. The drawbridge needs 4 gourds, each coloured tower needs 5 and the Black Obelisk needs 6, for 30 across the main route.
Why the Red Tower comes first
The Folding map gives the group a shared island view, and the Compass supplies a bearing when landmarks disappear behind a ridge. Together they help the group describe and follow later routes.
The Map Room, Folding map and Compass guide covers the five rewards, key-cutting route and pickup room. Once that room is open, choose the remaining towers by the transport or route your group wants next.
What each stage costs
| Stage | Gourds | What it opens |
|---|---|---|
| Drawbridge | 4 | bridge off the starting beach |
| Red Tower | 5 | Map Room |
| Green Tower | 5 | chairlift |
| Yellow Tower | 5 | tunnels and salon |
| Blue Tower | 5 | train |
| Black Obelisk | 6 | passage through the wall |
The island has 46 gourd pickups, while the route needs 30. Use Gourds without empty stands when collecting, then switch the stands back on when you need to deliver them.
All 8 key locations
All eight movable-key starting markers sit beside seven banks of gourd stands. Six banks show one starting key, and the bank with 7 stands shows two. The shoreline bank belongs to the drawbridge stage, while the four banks of five correspond to the coloured towers.
Show Keys without key slots for a clean eight-point checklist. The layer does not name each key by colour. If a movable key is missing, check with teammates before walking back to its starting bank. The gourd locations guide has the full table of bank sizes and links.
The 39 key slots
The other 39 markers in the Keys layer are key slots. Twenty-four form groups at five of the seven stand banks: one group of 7, two groups of 6, one group of 3 and one pair. Fifteen slots are marked singly.
Show Key slots without keys before following a cutting route. This removes the eight pickup markers and makes the next piece of key infrastructure easier to spot.
What Green, Yellow and Blue open
Green starts the chairlift between the north coast and the high south-east end of the island. Yellow opens the tunnels and salon. Blue starts the clockwise train that passes seven stations without stopping.
Use the train, chairlift and navigation guide for the full transport map. The links there separate stations, endpoints and trail runs.
Tower FAQ
Does the Red Tower have to be first?
No tower order is mandatory, but Red is the useful first choice because it unlocks the Map Room, Folding map and Compass.
How many gourds are needed for all main stages?
Thirty: 4 at the drawbridge, 5 at each of four coloured towers and 6 at the Black Obelisk.
Are keys and key slots the same map marker?
No. The Keys layer contains 8 movable keys and 39 key slots. Use the type filters to show one set at a time.
Maps in this guide
More Big Walk guides
Big Walk: All 46 Gourd Locations and 139 Gourd Stands
Big Walk marks 46 gourds on The Island, each one starting in a stand, plus 93 more stands with nothing on them.Read the guideBig Walk: All 84 Puzzle Locations and Player Counts
The Island has 84 marked puzzles, and 16 of them name how many players they want: 2, 3 or 4.Read the guideBig Walk Tool and Gear Locations: All 96 in 21 Types
The Island has 96 tool markers in 21 types, and five Gear types have one starting marker each.Read the guideBig Walk: The Train, the Chairlift and How Not to Get Lost
Five layers cover getting around The Island: 7 train stations, 6 chairlift markers, 7 broadcast stations, 12 telescopes and 25 trail stations.Read the guideBig Walk Map Room: Map and Compass Location
Unlock the Red Tower first, cut its key along the marked trail, then enter the blue Map Room below it for the Folding map and Compass.Read the guide